 The Global Header Settings
In this section, we'll cover how to build, customize and style the header section of the SEO Design Framework. In the Global Header section SEO Design > Header> you can perform the following 3 tasks.
1. Upload your logo
2. Build the header structure using the drag and drop and the + or – icons. You can rearrange multiple blocks in one row by resizing them horizontally or drag the blocks into the inactive section if they are not required.
3. Add Additional HTML (such as CSS, Shortcodes or scripts) to your Global Header sitewide.
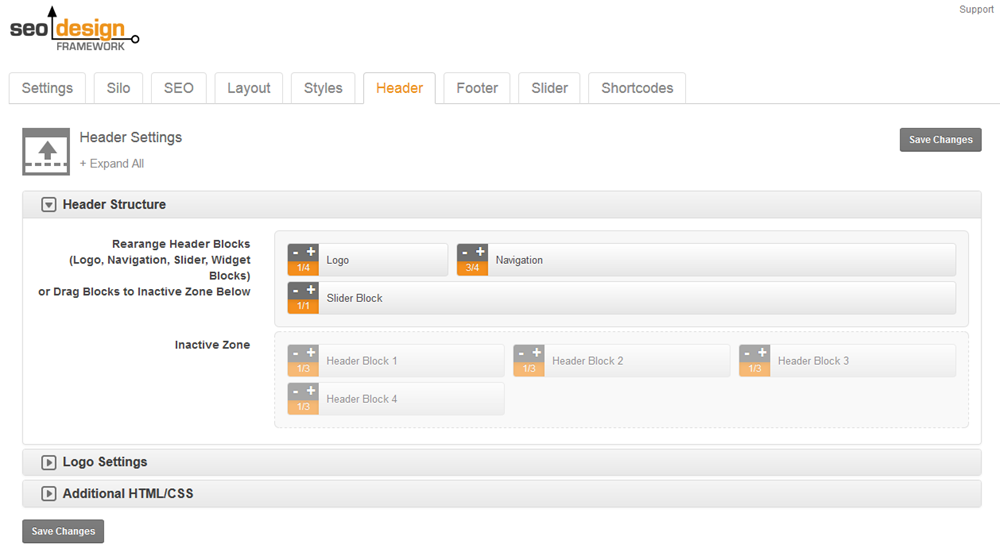
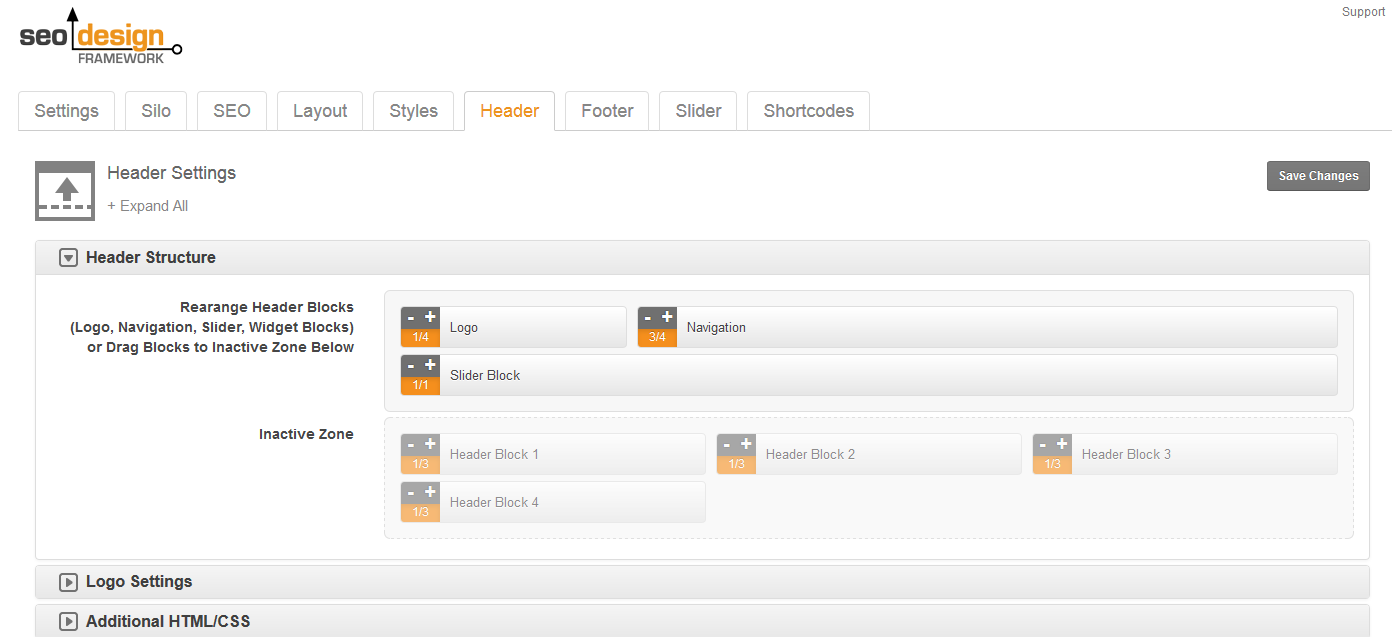
Start by setting up your global header active zones under SEO Design > Header > Header Structure by selectively arranging the blocks in the Header Structure tab. Sections you do not require can be dragged to the inactive zone.
Create the Global Header Configuration for the website using the following blocks in Header Structure.
The
Header Structure Chevron is Comprised of the Following
Widgetized Blocks:
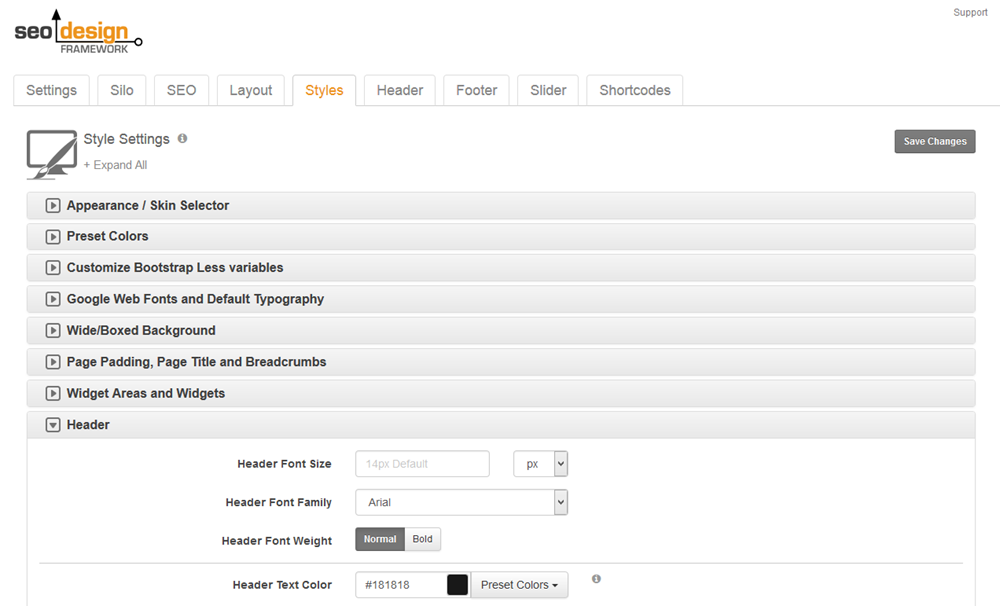
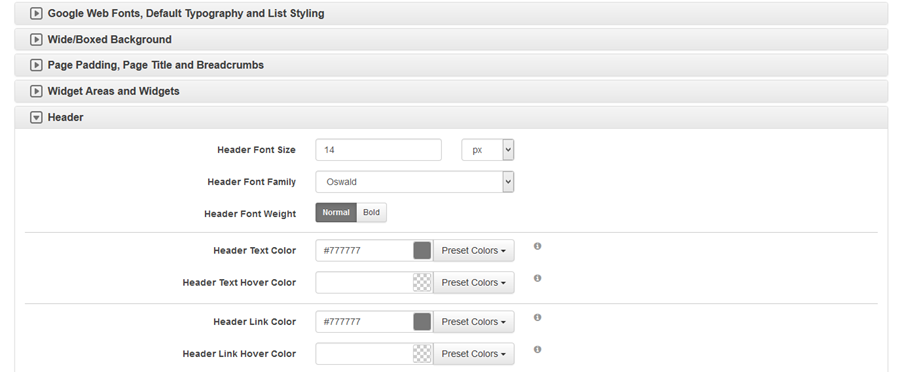
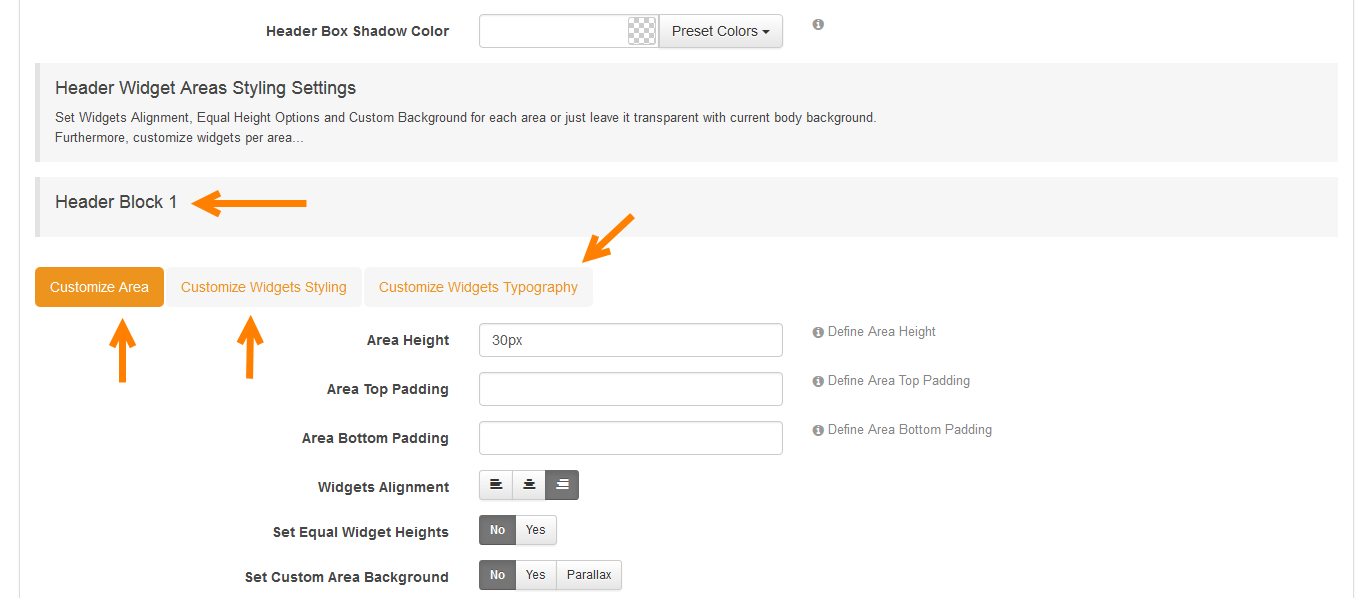
Each of these header blocks have style controls under SEO Design > Styles > Header >
The main
Header Chevron styles things you add to the main header area (in
Appearance > Widgets) then the contents of that header are styled by this section. Also, each header block has it's own styling options. Also, each header block has it's own styling options.
So, if you added a widget to header block 1, then the header block 1 styles are impacted by
SEO Design > Styles > Header > Header Block 1 options. But, you also have some layout options on how many widgets you want to put in header block 1 using
Appearance > Widgets > Header Block 1 > Widget layout (which means you can stack more than one widget in the area, depending on the widths defined in
SEO Design > Header > Header Structure).
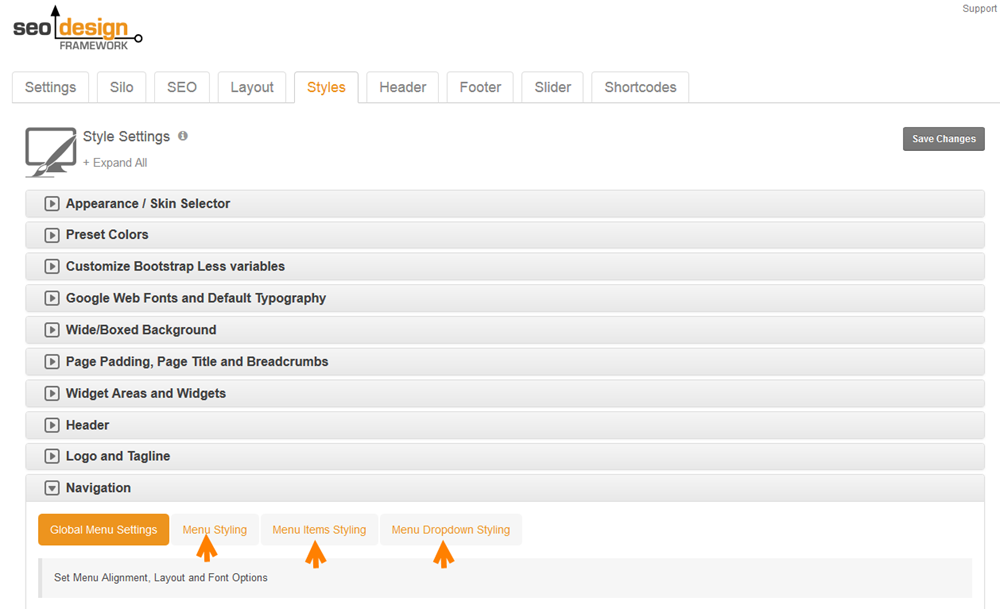
How to Style Navigation in the Header:
The navigation style settings are under
SEO Design > Navigation > you will find the primary global settings there such as
Default, Sticky, Fixed to Top and orientation options such as left, right, center, etc. in addition to tabbed areas for
Global Settings > Menu Styling > Menu Items Styling > Menu Dropdown Styling. These regions allow you to customize and personalize the navigation elements.
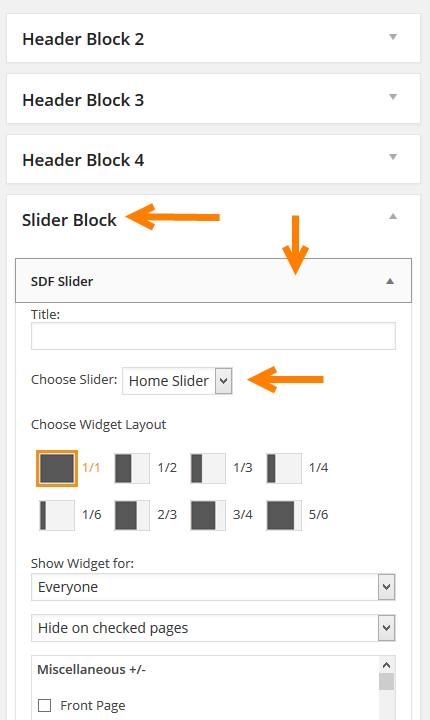
If you want to add a slider, then the
Slider Block needs to be active in the
SEO Design > Header > Header Structure>
Please note that the
Slider Block in
Appearance > Widgets > needs to have the
SDF Slider Widget dragged into the slider block (widget area) and the slide you want displayed
selected from the dropdown in order to show on the front end. But to create the slide, you will have to go to the
SEO Design > Slider > tab first and save and create your slider.
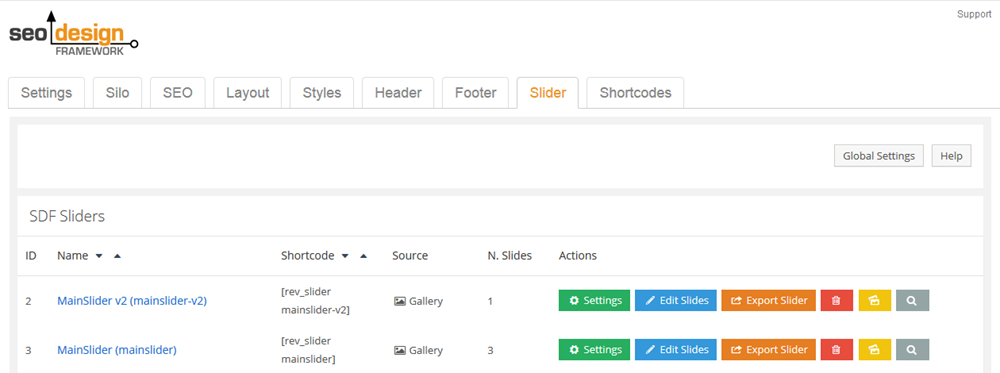
The
SEO Design > Slider > area looks like this. Just click the create new slide button to get started. As this is a third-party add on, we suggest you read the full documentation for
Revolution Slider here (link will open in new window).
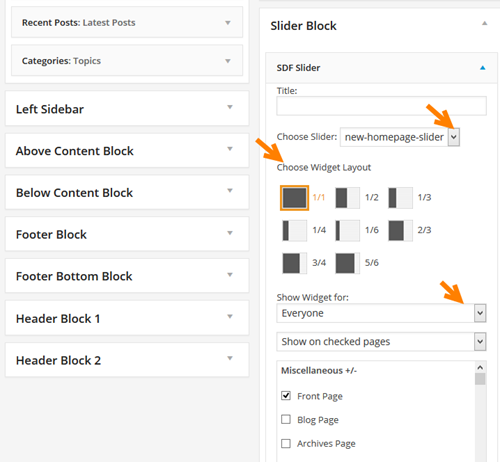
After your slide is created and since the slider is a widget, you can use widget layout under Appearance > Widgets > Slider Block > SDF Slider Widget (to determine which slider is showing and the layout you want for the slider block).
You can also use shortcodes from the slider and place them in the SDF builder using the SDF Builder Text Module (text option vs visual) and then pasting the slider shortcode there. Anything placed in the SDF slider is responsive to the layout you select. So, if you wanted to put the slider in the middle, then there is an orientation option on the text module (simply click center).
Keep in mind, that you can override the Global Settings using the Page Level Settings > Header Tab > Custom Header, in the event that you want each page to have a unique header configuration. Otherwise, setting the Global Settings here is sufficient for your sidewide layout.